Ergonomics – Permanently Adjusting Table Height

I intended to shorten my table/desk from the beginning of this ergonomics upgrade, but it took the longest to get to because it meant a lot of prep work.

Here are the links to the other post where I decided to do this modification and made other changes:
Ergonomics on the Cheap
Mouse placement
Mounting the Monitor to the Wall

Original desk height – monitor is directly above it

After cleaning off my desk, I was ready to take the table out and prep it for cutting.

Not really surgical precision, but my cutting won’t be either
One side marked
Both sides marked.  Ready to go

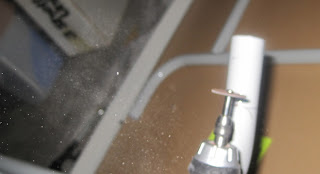
Now it’s cutting time.  I moved out to the garage for this, because it involved flying pieces of burning hot metal.  And it’s not like I have lots of flammable stuff out there…

Now we’re getting somewhere!

Here is the leg after the initial cut:

Cut complete

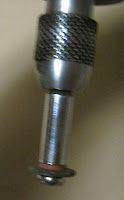
I used the other rotary bits to even out the edge and round it off (inside and outside).  I not only wanted to prevent cutting myself, I wanted to reduce the chance that the sharp edges would cut through the plastic endcap.

After cutting one leg and part of another, the cutting wheel was worn down to the nub.

I decided to try something that involved a bit less jumping around and scratching the leg (and possibly less burning embers flying around in my garage).

Plan B.  Cheap and easy (but labor intensive).

The saw was actually pretty easy to cut with once I added a groove with the rotary tool.  It was way too hot in the garage to not be sweating like crazy though.  In the end, the time was probably comparable to using the rotary tool.

Note the difference in distance between the legs, as compared with the earlier picture

Now it’s time to put this back together.  After putting the endcaps back on the feet, I noticed that it wasn’t as level as I’d like.  I used some ball bearings to measure – rolling around means the table isn’t flat.  I think this is a little easier than using a level to detect small imbalances.

Bearings at rest means table is level

I simply added some paper to one of the end caps to adjust the height (very slightly).  The result was a level table.  Success!

Fine tuning
Here are the final, shorter feet.

And, the complete picture.  Note the greater distance between the table and the monitor.

Final configuration – Monitor is same height, but desk is lower

In the end, this only took me about 2 hours to complete (not counting clearing off my desk).  However, the time I spent planning to get this done was over a month.

As for the ergonomics, this height is much better for me.  I’m conscious of not bending my wrists now, but having the desk at the right height makes it much easier.  I don’t know why I put up with using this height for so many years without making these changes.

Mounting the monitor to the wall

Mounting the monitor onto the wall was mostly difficult only because it was an enclosed space. I pulled the table out from the wall with enough space to get behind it, but not enough space to comfortably move. I never learn…

This post shows how I mounted my Asus 24″ monitor to the wall.

I took way too long to post this, so I’m going to make this more of a pictorial with less comments.

Also check out the other posts on ergonomics on this blog:
Ergonomics on the Cheap
Mouse placement
Cutting the Table Legs

Before: monitor on stand

Above is the monitor with the original stand: not height adjustable, and it wobbles when I type hard because its much heavier than my previous monitor.  Not a big deal, I planned to mount it to the wall before I even bought it.

The new mount
The mount hardware
Additional mount hardware and instructions

As I didn’t own more sophisticated hardware to check that the mount was level, I used a string with a weight.  Gravity is free!

Seems about level here
Mount tightened and ready
With the swing arm attached, we’re getting closer
Back of the monitor – holes for the VESA mount
VESA mount plate attached
Ball joint and mount plate from below
Side view – mounted and with cables hooked in
Top view
Side view – adjusted to desired position

Now that the monitor is mounted, it’s a lot more stable (only the speakers wobble if the table is shaken).  I could have mounted the mechanism a tiny bit higher to allow more adjustment, but I think it’s fine where it is.

I discovered that the range of tilt was less than I had hoped, so this can’t be moved low and tilted up very far.  something to keep in mind when choosing the height to mount the mechanism.

Final notes:
Tighten the ball joint bolts again after a few days to help reduce the looseness. It’s hard to keep this thing from tilting, so it’s best not to touch it once it’s in place. Otherwise, it seems to tilt to the side and be hard to level. I suppose a more expensive mount would have better balancing, but this does pretty well.

A more expensive mount might have a better ball joint, but this one does fine.

Next
Coming soon, the modification to my desk to make it shorter.

Things forgotten – Saving words to the dictionary on an Android phone

I really need to go back through my Android phone notes again and post them.  I’ve already forgotten an rediscovered some good tips, like this:

You can easily add words to your dictionary while typing by long pressing on the word from the suggestion bar over your virtual keyboard.

First type the word as you want it to show, then execute a long press on the word in the ‘word suggestion bar’ next to the suggested words that highlight in bold orange… this long press will automatically save it to your dictionary.

If you add a word by accident, you can remove it by going to Settings ==> Language & keyboard ==> User dictionary, scroll down to find the word you input, select it, then press Delete.

A note about scheduling

Several weeks later, I still haven’t cut the legs on my desk.  And now I’ll need to clear some space in the garage.  However, as I’ve been spending much more time at my home office, the extra height is really becoming noticeable and uncomfortable.    As usual, the myriad of projects on my plate all compete for my time and it’s hard to get anything done.  This one is important though!  Hopefully I’ll have a better status report soon, rather than suffering the consequences of not completing the projects related to comfort and safety!

Ergonomics update: mouse placement

A slight update to my previous post on ergonomics:  when I changed the location of my monitor (by mounting it to the wall) I moved my keyboard closer to the edge of the desk, thinking that was a good distance from my eyes to the monitor.  However, after a few weeks of unconsciously moving the mouse to the edge of the desk to match where the keyboard was, I realized that my wrist was hurting.  When the mouse is close to the edge, my wrist rests on the edge and isn’t at a good angle.  Oops!  I moved the keyboard a bit further back and am conscious to keep the mouse even further from the edge, and things are much more comfortable.

I expect that the whole thing will be more comfortable when I get to shortening the desk, but I haven’t finished that yet!