I intended to shorten my table/desk from the beginning of this ergonomics upgrade, but it took the longest to get to because it meant a lot of prep work.
Here are the links to the other post where I decided to do this modification and made other changes:
Ergonomics on the Cheap
Mouse placement
Mounting the Monitor to the Wall
 |
| Original desk height – monitor is directly above it |
After cleaning off my desk, I was ready to take the table out and prep it for cutting.
 |
| Not really surgical precision, but my cutting won’t be either |
 |
| One side marked |
 |
| Both sides marked. Ready to go |
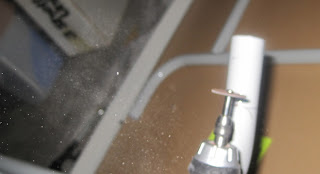
Now it’s cutting time. I moved out to the garage for this, because it involved flying pieces of burning hot metal. And it’s not like I have lots of flammable stuff out there…
 |
| Now we’re getting somewhere! |
Here is the leg after the initial cut:
 |
| Cut complete |
I used the other rotary bits to even out the edge and round it off (inside and outside). I not only wanted to prevent cutting myself, I wanted to reduce the chance that the sharp edges would cut through the plastic endcap.
After cutting one leg and part of another, the cutting wheel was worn down to the nub.
I decided to try something that involved a bit less jumping around and scratching the leg (and possibly less burning embers flying around in my garage).
 |
||
| Plan B. Cheap and easy (but labor intensive). |
The saw was actually pretty easy to cut with once I added a groove with the rotary tool. It was way too hot in the garage to not be sweating like crazy though. In the end, the time was probably comparable to using the rotary tool.
 |
| Note the difference in distance between the legs, as compared with the earlier picture |
Now it’s time to put this back together. After putting the endcaps back on the feet, I noticed that it wasn’t as level as I’d like. I used some ball bearings to measure – rolling around means the table isn’t flat. I think this is a little easier than using a level to detect small imbalances.
 |
| Bearings at rest means table is level |
I simply added some paper to one of the end caps to adjust the height (very slightly). The result was a level table. Success!
 |
| Fine tuning |
And, the complete picture. Note the greater distance between the table and the monitor.
 |
| Final configuration – Monitor is same height, but desk is lower |
In the end, this only took me about 2 hours to complete (not counting clearing off my desk). However, the time I spent planning to get this done was over a month.
As for the ergonomics, this height is much better for me. I’m conscious of not bending my wrists now, but having the desk at the right height makes it much easier. I don’t know why I put up with using this height for so many years without making these changes.


